Ubuntu Samba Share
A guide to setting up a secured Samba share on Ubuntu with username/password authentication, covering installation, configuration, permissions, and mounting the drive on both Windows and Linux.
Create a Samba Share 2024
Windows and Linux Sharing
I am really trying to knock a bunch of things off my to-do list, and today I finally set up a few Samba shares. These are great because it is easy to connect both Linux and Windows to the shared drive. I've used unsecured Samba shares before but this time I wanted to add a little extra security by requiring a username and password. In this guide we will be doing the following:
- Install Samba on Ubuntu
- Set up the Samba config
- Create the Samba user group
- Create a Samba folder we want to share
- Set the appropriate permissions for the Samba shared folder
- Create users that can access the shared drive
- Mount the drive as a network drive in Windows
- Mount the drive as a network drive in Ubuntu
If this seems like a lot, it really is not. We can knock this out in 10-15 minutes!
Install Samba on Ubuntu
Update your apt repositories and then install samba:
sudo apt update
sudo apt install sambaDone!
Set Up Samba Config
When Samba is installed it creates a default config. There is a lot going on in the default config, so I usually back it up and create a new one. To set it as a backup we can simply rename it:
sudo mv /etc/samba/smb.conf /etc/samba/smb.conf.oldI know we use the 'mv' command here, but it is basically how you rename something.
Now create a new smb.conf
sudo nano /etc/samba/smb.confAnd then add the structure of your config:
[global]
   workgroup = WORKGROUP
   server string = Samba Server
   security = user
   map to guest = Bad User
   dns proxy = no

[my_share]
   path = /media/my_share
   browseable = yes
   read only = no
   guest ok = no
   valid users = @smbusers
   create mask = 0664
   directory mask = 2775
Here is an explanation of what we specified in the config:
The 'global' section just sets some global settings:
- workgroup - here we are using the default for Windows "WORKGROUP"
- server string - Name of our Samba server
- security - user means that each user must authenticate with a valid username & password
- map to guest - this is set to bad user which means unauthorized users will be mapped to the guest account. We can set granular access on what the guest account can do for each shared drive.
- dns proxy - we set this to 'no' so that Samba does not try to resolve NetBIOS names via DNS. Most of the time this will be no
In the next section we describe our actual share that we want to set up:
- [my_share] is the name we are giving this share, you can update it to something else if you would like
- path - the full path to your shared folder
- browseable - makes the share visible when browsing the network
- read only - set to 'no' since we want to be able to read and write
- guest ok - guest users are not permitted - this means when an unauthorized user is mapped to the guest account, they will not be able to access this share
- valid users - we are restricting users to the smbusers group, which we will soon create
- create mask is set to 0664 which gives read/write access
- directory mask is set to 2775 which gives read/write access but also inherits the ownership of the parent directory which is what we want.
Create the Samba Group
Since we are setting valid users to those in the smbusers group, let's create it:
sudo groupadd smbusersNow add your current users to the smbusers group so that you will have access to the share drive locally
sudo usermod -aG smbusers <your_username>Then apply the group changes
newgrp smbusersCreate Samba Share Folder
If you plan to share an entire disk you can use the mount point for that disk. For instance if I mount /dev/sda to /media/shared I could just use that folder. But if you want to share a specific folder inside that, or create a share on your OS drive, you need to create it. If using the OS drive, I suggest creating something under /media. I will be doing just that:
sudo mkdir /media/my_shareBy default folders created under /media are owned by root, but we will update the permissions to be appropriate for Samba later
Set Share Ownership and Permissions
Now we need to make sure that users in the smbusers group have the appropriate permissions on our share folder. We can do this by setting the ownership to root:smbusers and the permissions to 0775. Make sure to update the below commands to your path
sudo chown -R root:smbusers /media/my_shareNow make sure the user and group have appropriate permissions (read/write/executable)
sudo chmod -R 0775 /media/my_shareOne last thing we want to do is set the SGID bit so that all files and subdirectories created within the shared folder inherit the group ownership of the parent directory (smbusers). To do this run:
sudo chmod -R g+s /media/my_shareCreate a User
Now create a user which will be part of the smbusers group and will have access to the share:
sudo useradd -s /sbin/nologin -G smbusers my_userMake sure to change 'my_user' to the username of your choosing. This creates a user, adds it to the smbusers group, and prevents the user from logging in since this will not be a normal Linux user and is only used for the share. We will now add the user to Samba, and set a password for that user
sudo smbpasswd -a my_userAnd don't forget to remember your password - we will need it when logging in to the share later.
Now we can restart the Samba server for all of our changes to take effect.
sudo systemctl restart smbdMapping the Drive in Windows
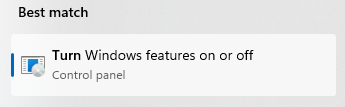
Make sure that you have CIFS client enabled. In Windows 11 you can do this by searching 'turn windows features' in your Windows search bar.
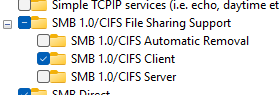
Now scroll down to "SMB 1.0/CIFS File Sharing Support" and make sure "SMB 1.0/CIFS Client" is checked. You can leave the other two unchecked.
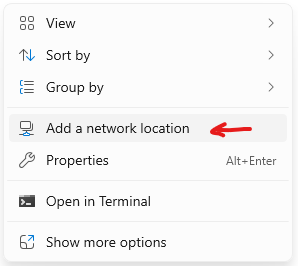
Windows will need to install some things, and then reboot. If I remember correctly it says it is installing some updates. Let the process finish, when you are back in windows open up the file explorer, then right click and select "Add a Network Location".
Click 'Next', select "Choose a custom network location", and then enter in the address of the drive, which should be something like
\\<SAMBA SERVER IP>\<SHARE NAME>
If you aren't sure of the IP for your Samba server, you can grab it with the following command on the computer that you are running Samba on:
hostname -I
If you have docker or other virtual networks you might see a few IPs, typically its the first one listed and starts with '192' but yours may be different.
So for me, since my IP is 192.168.69.100 and I named my share 'example' in the config, I would map to:
\\192.168.69.100\example
The share name might even populate automatically, which is a good sign things are working well. You will be prompted to login, make sure to use the username and password we created earlier.
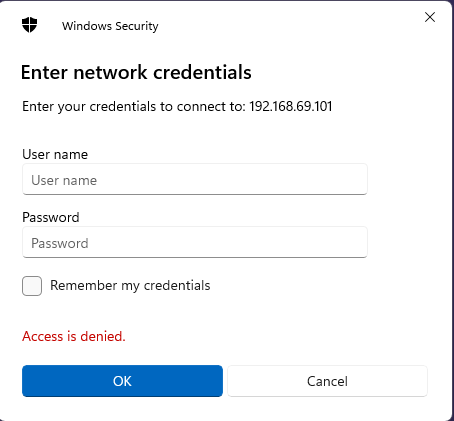
The drive should open and you should be able to create files and directories!
Mounting the Drive in Linux
If you have another linux machine and you want to have the disk automount on boot, you can add it to your FSTAB which is really easy. I share a lot of files between all my servers, so having a central place to dump files is really convenient.
First, install dependencies:
sudo apt update
sudo apt install cifs-utilsThen, create a credentials file
sudo nano /etc/samba/credentialsThen add the username and password you created for the Samba user:
username=<your-samba-username>
password=<your-samba-password>
CTRL+X, then Y, then ENTER to save. Now make sure only root can read the credential file:
sudo chmod 600 /etc/samba/credentialsCreate a mount point under /media:
sudo mkdir /media/sharedSet permissions:
sudo chown :hakehardware /media/shared
sudo chmod 0775 /media/sharedNow simply add the mount to your FSTAB file:
sudo nano /etc/fstabI like to create a section called 'Samba':
# Samba
//192.168.69.101/my_share       /media/shared   cifs    credentials=/etc/samba/credentials,uid=1000,gid=1000,iocharset=utf8     0       0
This one has a lot going on but the main thing is we are mounting the Samba to /media/shared, it's using CIFS, we feed it our credential file, we set the default ownership of the shared drive that we mount locally to our own user (update this to your Linux user and group), and set the correct encoding.
Now mount it
sudo mount -avIt should now be mounted and accessible! You can confirm with:
df -hYou should now see it. Perfect. We did it. Time for more coffee!