Tutorial
Install Ubuntu WSL
This guide will provide instructions on how to install WSL on Windows 11
This post contains paid links (affiliate) — how that works.
Install Ubuntu
Windows 11 makes it extremely easy to install WSL and Ubuntu. Open up the Terminal by pressing WIN + x and then select "Terminal". Then paste in:
wsl --install --no-distribution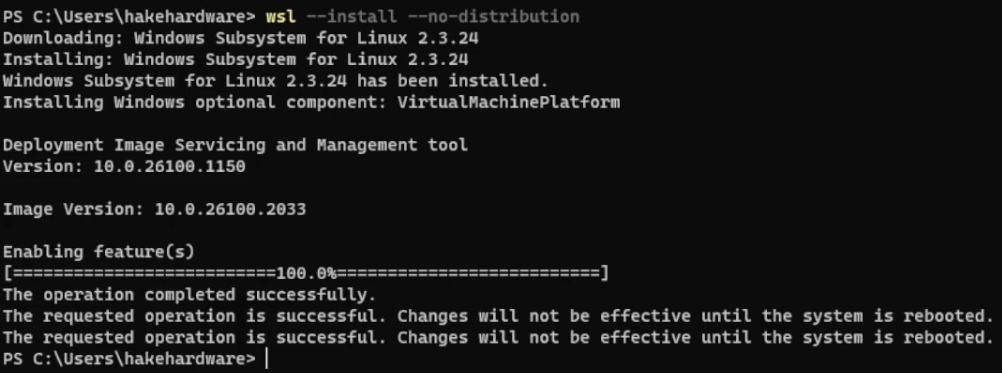
Reboot once the installation is complete.
Once WSL is installed, the available distros can be viewed with:
wsl --list --online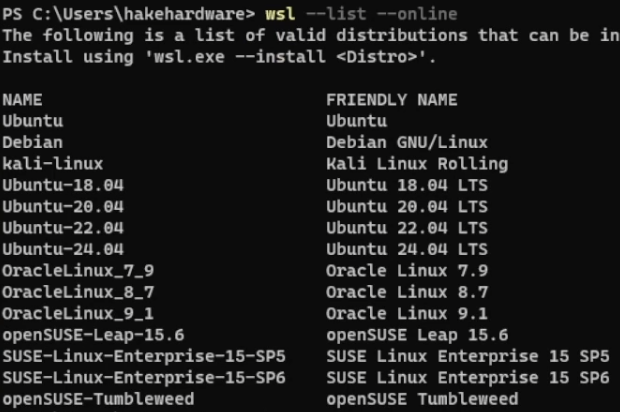
I prefer to install Ubuntu 24.04 which is the latest version at the time. To install, run:
wsl --install -d Ubuntu-24.04Install Updates
Once Ubuntu is installed a prompt will be displayed to provide a username and then password. Afterwards, Ubuntu will be logged in and should be updated. Paste in:
sudo apt update && sudo apt full-upgrade -yOnce complete, restart WSL with the following commands.
Exit Ubuntu:
exitShutdown WSL:
wsl --shutdownThen start WSL back up with:
wslSetting a Default Distro
If more than one distro is installed, it is possible to set the distro that is used as the default. First, list the installed distros:
wsl -l -vThen set whichever one should be default:
wsl --set-default <DISTRO>Keep Ubuntu VM Running
If running into issues where the Ubuntu VM keeps shutting down (which was happening to me and closing all my Docker containers), consider configuring WSL to auto start.