Tutorial
Mount Physical Drive
How to mount a physical drive in WSL
This post contains paid links (affiliate) — how that works.
Contents
Identify Disks
Press WIN + x and then select "Terminal (Admin)" or right click on the start menu and select "Terminal (Admin)". Then execute the following command to identify the disks:
GET-CimInstance -query "SELECT * from Win32_DiskDrive"
Each disk has a device ID like \\.\PHYSICALDRIVE1. The 1 at the end typically indicates the Disk number as shown in the Disk Management tool. Open up Disk Management by press WIN + x and then selecting "Disk Management".
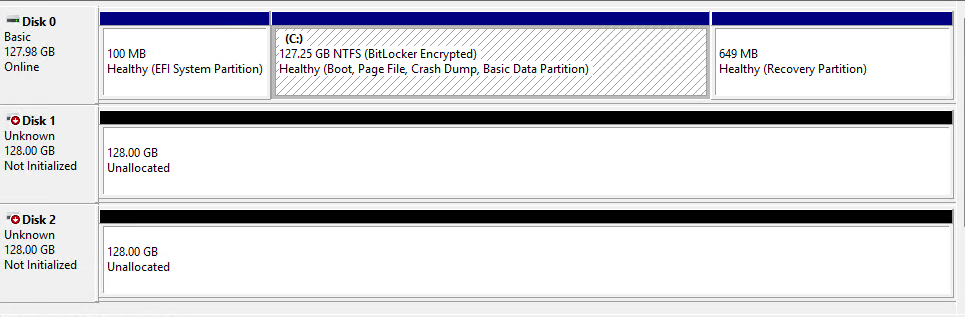
As can be seen, there is a Disk 0, 1, and 2. This corresponds to \\.\PHYSICALDRIVE0, \\.\PHYSICALDRIVE1, and \\.\PHYSICALDRIVE2.
Attach Disk
Once the disk is identified, copy the "DeviceID" value and attach the drive. As an example, I will use \\.\PHYSICALDRIVE1
wsl --mount \\.\PHYSICALDRIVE1 --bareThis attaches the drive but does not mount it. The disk must be formatted with the ext4 partition before it can be mounted.

Log into WSL:
wslIdentify Disk Pt. 2
View block devices to identify the disk:
lsblk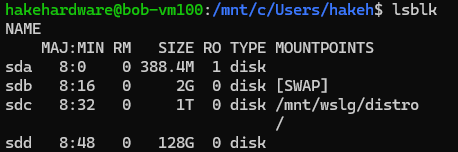
In this example, I can see the disk sdd is the 128G disk I attached. It needs to be formatted and mounted.
Format Disk
Format the disk with ext4:
sudo mkfs.ext4 -m 0 /dev/sddThe -m 0 sets the reserved space for the disk to 0 and is optional. The disk is now ready to be mounted.
Mount Disk
Create a mount point for the drive. I prefer to mount to /media:
sudo mkdir /media/ssdThen mount the drive:
sudo mount /dev/sdd /media/ssdConfirm the drive has been mounted:
df -hGet the UUID of the disk and save it:
lsblk -fThis mount is only temporary until the .wslconfig is updated. First, add an entry to the FSTAB file:
sudo nano /etc/fstabBelow the comment, add the following, updating the UUID to match:
UUID=<UUID> /media/ssd ext4 defaults 0 0Save with Ctrl+X, Y, Enter. Exit Ubuntu:
exitAuto Mount
There are two actions that need to occur in order for the disk to be mounted inside WSL to the correct location. The FSTAB has already been updated. Next, Windows needs to mount the physical disk at login. To do this, a scheduled task can be created.
Schedule Task
In the windows search, type in "Task Scheduler" and select the application
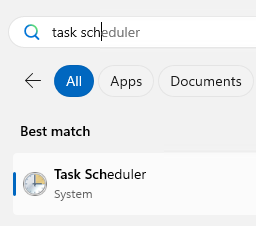
Once open, on the right side click "Create Task...". Then follow the steps below:
- Set the Name to "WSL Mount Task"
- Check "Run only when user is logged on"
- Check "Run with highest privileges"
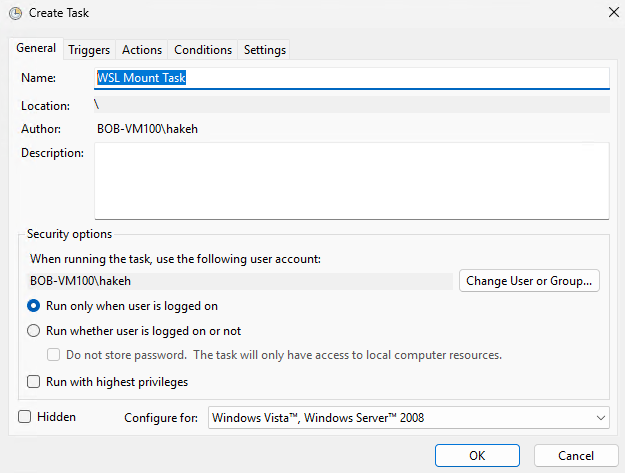
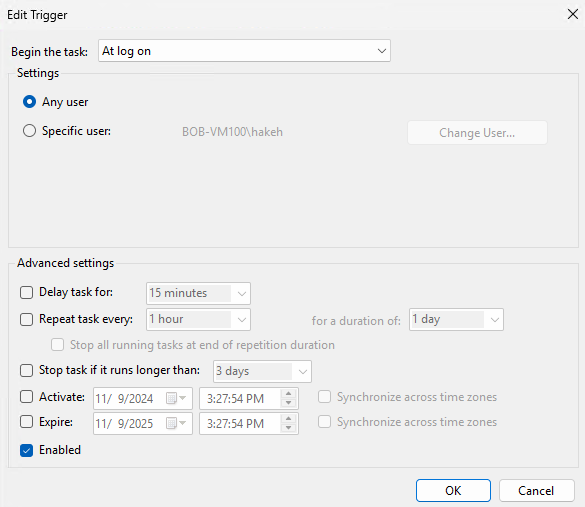
Click the "Triggers" tab. Then follow the steps below:
- Click "New..." to create a new Trigger
- In the "Begin the task" drop down, select "At log on"
- Ensure the "Enabled" checkbox is checked
- Click "OK" to add the Trigger
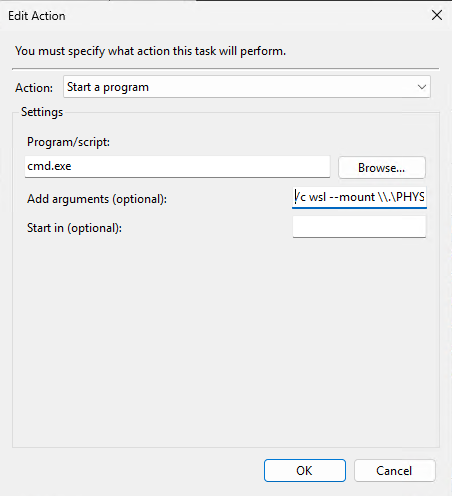
Click the "Actions" tab. Then follow the steps below:
- Click "New..." to create an Action
- For "Program/script" type
cmd.exe - For "Add arguments" paste in
/c wsl --mount \\.\PHYSICALDRIVE1 --barereplacingPHYSICALDRIVE1as needed. - Click "OK" to add the Action
Click the "Conditions" tab. Then uncheck all boxes.
Click the "Settings" tab. Then follow the steps below:
- Check "Allow task to be run on demand"
- Check "Run task as soon as possible after a scheduled start is missed"
- Check "Stop the task if it runs longer than 3 days"
- Check "If the task does not end when requested for it to stop"
Once all sections have been completed click "OK".
Reboot the computer.
Verify
Press WIN + x and then select "Terminal(Admin)". Then open wsl:
wslOnce logged in, verify that the disk is mounted:
df -hThe disk should now be mounted.